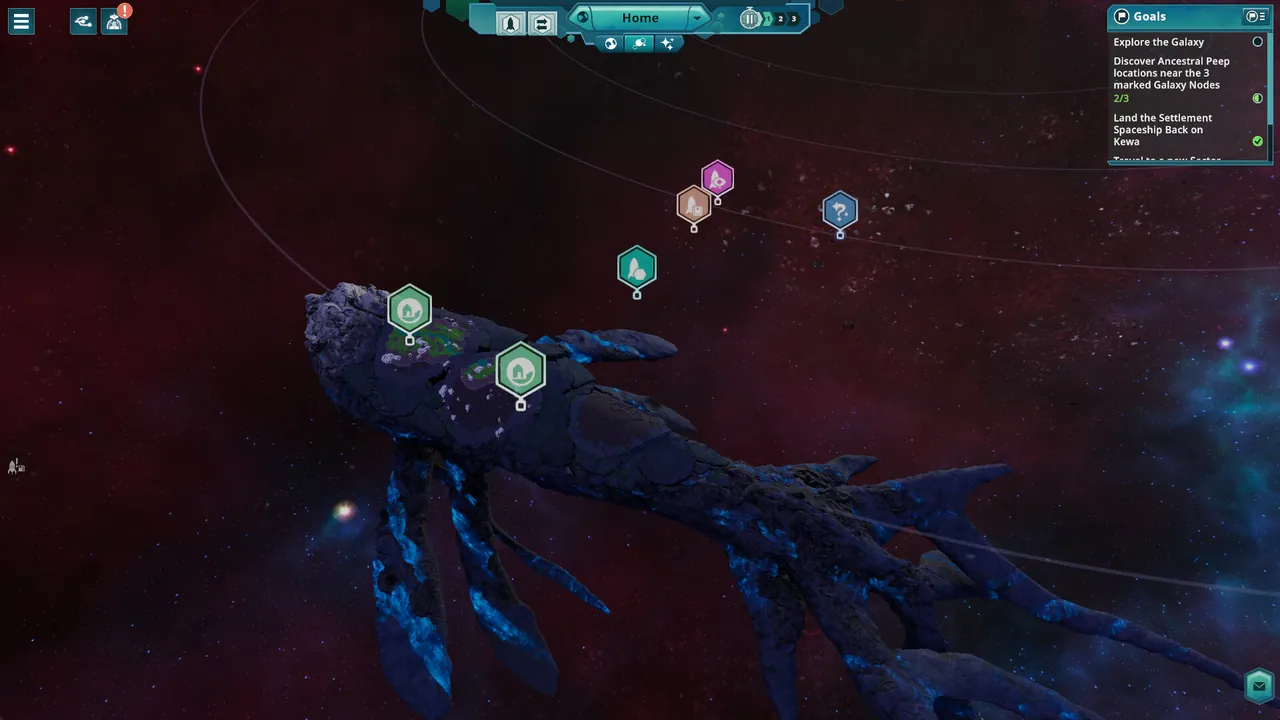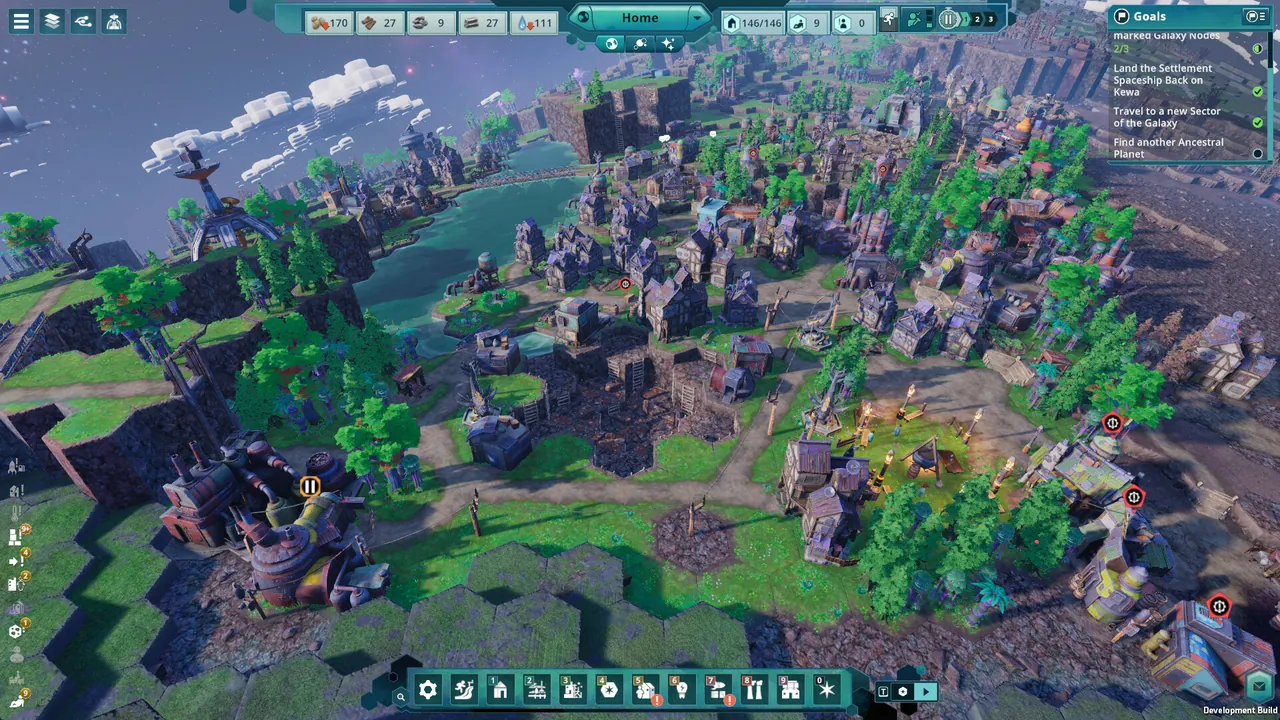
Your first hours on Kewa decide how the next few shifts go. The game opens with Kewa — the sentient space whale your Peeps live on — jumping away from the home planet, which leaves you in charge of a small population and a borrowed pile of supplies. Nothing about that opening rewards speed. It rewards the order you do things in.
Peeps, Kewa and What You Start With
Your colonists are Peeps, the potato-eating species from the studio's earlier game Before We Leave, and they live on the back of Kewa, a whale large enough that its body is your map. The jump that opens the story is not your decision. Kewa "zoots" the colony away from the Peeps' home planet, and the campaign that follows is about revisiting ancestral planets rather than finding a way home.
The Home Spaceship is your colony's anchor. It is a multi-tile structure that the Peeps land in and that sits at the centre of the early settlement. Food and water are not a stock you can coast on — from the first day, both are production you run yourself, which is exactly why the Potato Patch and Water Pump are part of the starting four (official wiki).
Two panels tell you whether the colony is working. The top resource bar carries your stockpiles next to population, unemployed and sick counts, so a glance answers whether anything is being made and whether anyone is idle; pre-release screenshots place those numbers on the bar. The Goals panel groups objectives into chains, and the build shown ahead of launch lists entries such as "Build a Research Facility on Kewa", "Travel to a new Sector" and "Research Sludge". Check the current goal before you commit to a new production line.
Community records of the demo name the crew who talk to you — Kieran on science, Matilda on farming, Lottie on engineering, Jose flying the Scout Ship. The settlement decisions stay yours whoever is speaking.
The First Build Order
Housing comes first, and it is the thing new colonies forget to keep expanding. Huts give Peeps somewhere to recover the energy that working spends, and a housing shortage is one of the root causes the game names when unhappiness turns into a strike. Add a Hut before you add anything decorative.
Two placement rules shape everything that follows, both documented on the official wiki. Peeps pick a workplace near their home and will not work further than 16 tiles away, so a housing block quietly sets the radius of the industry it can staff — build housing at the edge of the settlement and half your jobs go unfilled. And shifts are synchronised: every Peep works, eats and rests on the same timetable, which means a colony with more jobs than workers leaves its least important workplace unstaffed each shift.
The order below holds for the current demo and for the 1.0 release.
| Priority | What to secure first | Why it matters |
|---|---|---|
| 1 | Huts for the whole population | Sleeping restores the energy that shifts and work spend |
| 2 | A Water Pump | Establish a continuing water supply instead of relying on starting resources |
| 3 | A Potato Patch for food | Potatoes are the Peep staple, and the Patch is one of the four starting buildings |
| 4 | A Woodcutter near the forest | Timber is consumed fastest, and a standing forest keeps supplying it |
| 5 | Roads linking all four | The store description flags adjacency bonuses and travel times, and distance costs you both |
Housing, water, food and timber are the four foundations; the rest of the palette is an upgrade layered on top of them. Smelters, the Research Facility and larger storage can wait until those four run without you watching them.
Expect each production line to hand you a second resource as well as the one you wanted. Hands-on previews indicate that every line returns a main product plus a byproduct, and that leftovers such as soot and wood waste are part of the design rather than a mistake. Decide where the second output goes while you are placing the building, and give the colony a Dump before the first industrial building starts producing.
The buildings guide covers what each structure does, and production chains explains why waste is worth keeping rather than merely surviving. If you are placing a multi-tile building for the first time, the controls page covers rotation and road mode.
Pro tip: Lay the roads before you place the buildings that need them. Once the road requirement toggle is on, a building placed away from the network becomes a demolition job, and one pass of road at the start costs less than rerouting the district later.
Peep Energy, Pollution and Leaving the First Region
Peeps gain happiness by relaxing, eating, drinking and standing near decorations. They lose it while working and while crossing polluted tiles, and the loss is not background noise — happiness feeds the strike system, where a large share of unhappy Peeps halts part of your production while the strikers block the colleagues still working.
Energy sits behind that. In the 1.0 release, a Peep whose energy runs low can fall sick when a shift changes; sick Peeps stay home, and one left untreated long enough dies, which drags down the happiness of the whole community. The Apothecary produces what a sick Peep needs to recover, so build one before the first case rather than after it.
Pollution punishes you twice. Peeps slow down on polluted or poisoned ground and their happiness falls faster the heavier the pollution gets, which makes a dirty factory district a double cost. Trees, distance between polluting buildings and a Cleaner are your levers. The pollution guide covers the buildings; the working rule for a young colony is that a tile you pollute is a tile your Peeps will avoid.
Kewa keeps its own score. Its health tracks the biome you build in — trees planted, pollution cut, rivers around the settlement — and temperature belongs to the same system: leave the whale too hot for too long and it grows unhappy, and if its condition falls far enough it will travel on its own to a cold region to cool down. Higher health pays you back with faster journeys between stars and more of the memories Kewa shares when you talk to it, so caring for the whale is not a side activity.
Travel unlocks later as the story introduces exploration. The Scout Ship investigates objects around Kewa, while ordinary shipping needs Landing Pads. The Settlement Ship is the exception: it can make the first planetary landing without a pad, but must have a Space Port built in the area before it can depart again. Strengthen the relationship as well — a weak bond makes Kewa's departures harder to predict. The Kewa care guide breaks down the health signals worth watching.
For problems after the opening, use the happiness and strikes guide to follow a strike goal, or the sickness and mourning guide to investigate low energy and absent workers. The Sandbox settings guide covers the custom setup options confirmed for the full release.
Sources
- Official Hooded Horse wiki, Peeps (16-tile work radius, synchronised shifts): https://wiki.hoodedhorse.com/Beyond_These_Stars/Peeps
- Official Hooded Horse wiki, Technology tree (starting four buildings): https://wiki.hoodedhorse.com/Beyond_These_Stars/Technology_tree
- Steam store page (story, terraforming, adjacency and travel times): https://store.steampowered.com/app/2295060/
- Steam announcement, "Dev Blog #29: Keeping Kewa Happy": https://store.steampowered.com/news/app/2295060/view/1840944183775191
- Steam announcement, "Dev Blog #25: Peep Sickness": https://store.steampowered.com/news/app/2295060/view/1833968530889579
- Steam announcement, "Dev Blog #23: Strikes": https://store.steampowered.com/news/app/2295060/view/1830163047253538
- Steam announcement, "Developer Diary: Space Ships": https://store.steampowered.com/news/app/2295060/view/1784506359047856
- Epic Games Store hands-on preview (two-output production lines, soot into steel, Kewa's reactions): https://store.epicgames.com/en-US/news/beyond-these-stars-is-a-sustainable-city-builder-where-you-survive-on-the-back-of-a-sentient-celestial-whale